Saturday, December 29, 2007

10 Favorites from 2007

As 2008 approaches it's so fun to look back!!!
Thinking about the changes, the sad times,
the happy times. Remembering that...
"to every thing there is a season,
and a time to every purpose under the heaven"
I've selected my 10 favorites layouts, at this moment,
in no particular order :)


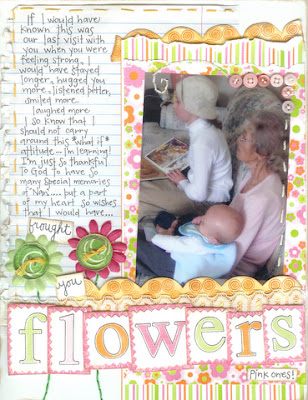
One of the most exciting 2007 moments was this layout....

Friday, December 28, 2007

Tuesday, December 18, 2007

Shine :)

Altered Light Switch Plate
Supplies:
Light Switch Plate (I got mine at Home Depot for 33 cents)
Printed Paper (4 ½” X 6)
Punched Stars and Buttons
Glitter Paint
Velvet Thickers
Embroidery Floss
Wet Glue
Mod Podge
*****
1. Trace on the wrong side of paper where the centre of the light switch plate will be. Cut out centre and glue paper onto front of the light switch plate.

2. Fold Paper around to the back and glue down.

3. Using a pencil poke where the screws will be.

4. Glue on stars. Apply a layer of Mod Podge. Once dry apply a layer of glitter paint.

5. Add your “title”, (I used “shine”) and buttons. You can decorate as you wish after point number 3!

Monday, December 17, 2007

A Very Happy Day :)

Every year when the 17th of December roll around
I rejoice.
*****
Twelve years ago this day I had emergency surgery
to remove a baseball size tumor from my brain.
I remember my husband saying to me after,
"The Anesthesiologist said they lost you for a minute."
So today I rejoice in twelve *extra* years,
a happy marriage,
three incredible children,
an amazing family,
fabulous friends,
and God my saviour.

Wednesday, December 12, 2007

Little Present Blocks

I made these for my favorite *LSS* ladies...and wanted to share how to create them :) They would make such fun place cards!

Supplies:
Square Wooden Block (mine is 1 ¼ inches)
White Paint
Glitter Paint
Printed Papers
3 D Foam Squares
Ribbon
Tiny Tag
Paint Brush
Sand Paper
Pen
*****
Instructions:
1. Paint wooden block white. I used two coats with a final coat of glitter paint!
2. Cut 3D Foam Square into ¼ inch strips and attach around the top diameter of your block.
3. Cut a strip of printed paper to ¼ X 6 inches. Attach to the 3D foam squares around the top of the block. There may be a little extra to trim off.
4. You will then have to measure the top area and cut a square of printed paper to cover. Glue onto the top of your block.


5. Wrap ribbon around block and add a small tag with name!

Thursday, December 6, 2007

For Your Posties :)

I've got a tutorial on how to make this
fun project at the Maya Road DT Blog.
Click here to learn how!

Monday, December 3, 2007

He Warms

“He will be a joy and delight to you,
and many will rejoice because of his birth”
Luke 1:14


Saturday, December 1, 2007

Little Thoughts

of love.
*****
Used some beautiful papers from Scrap Mode!
I love the vintage look of the papers....and
lots of fun buttons :)